Adventure’s Role in Self-Discovery with Former Marine, Tom Foxley

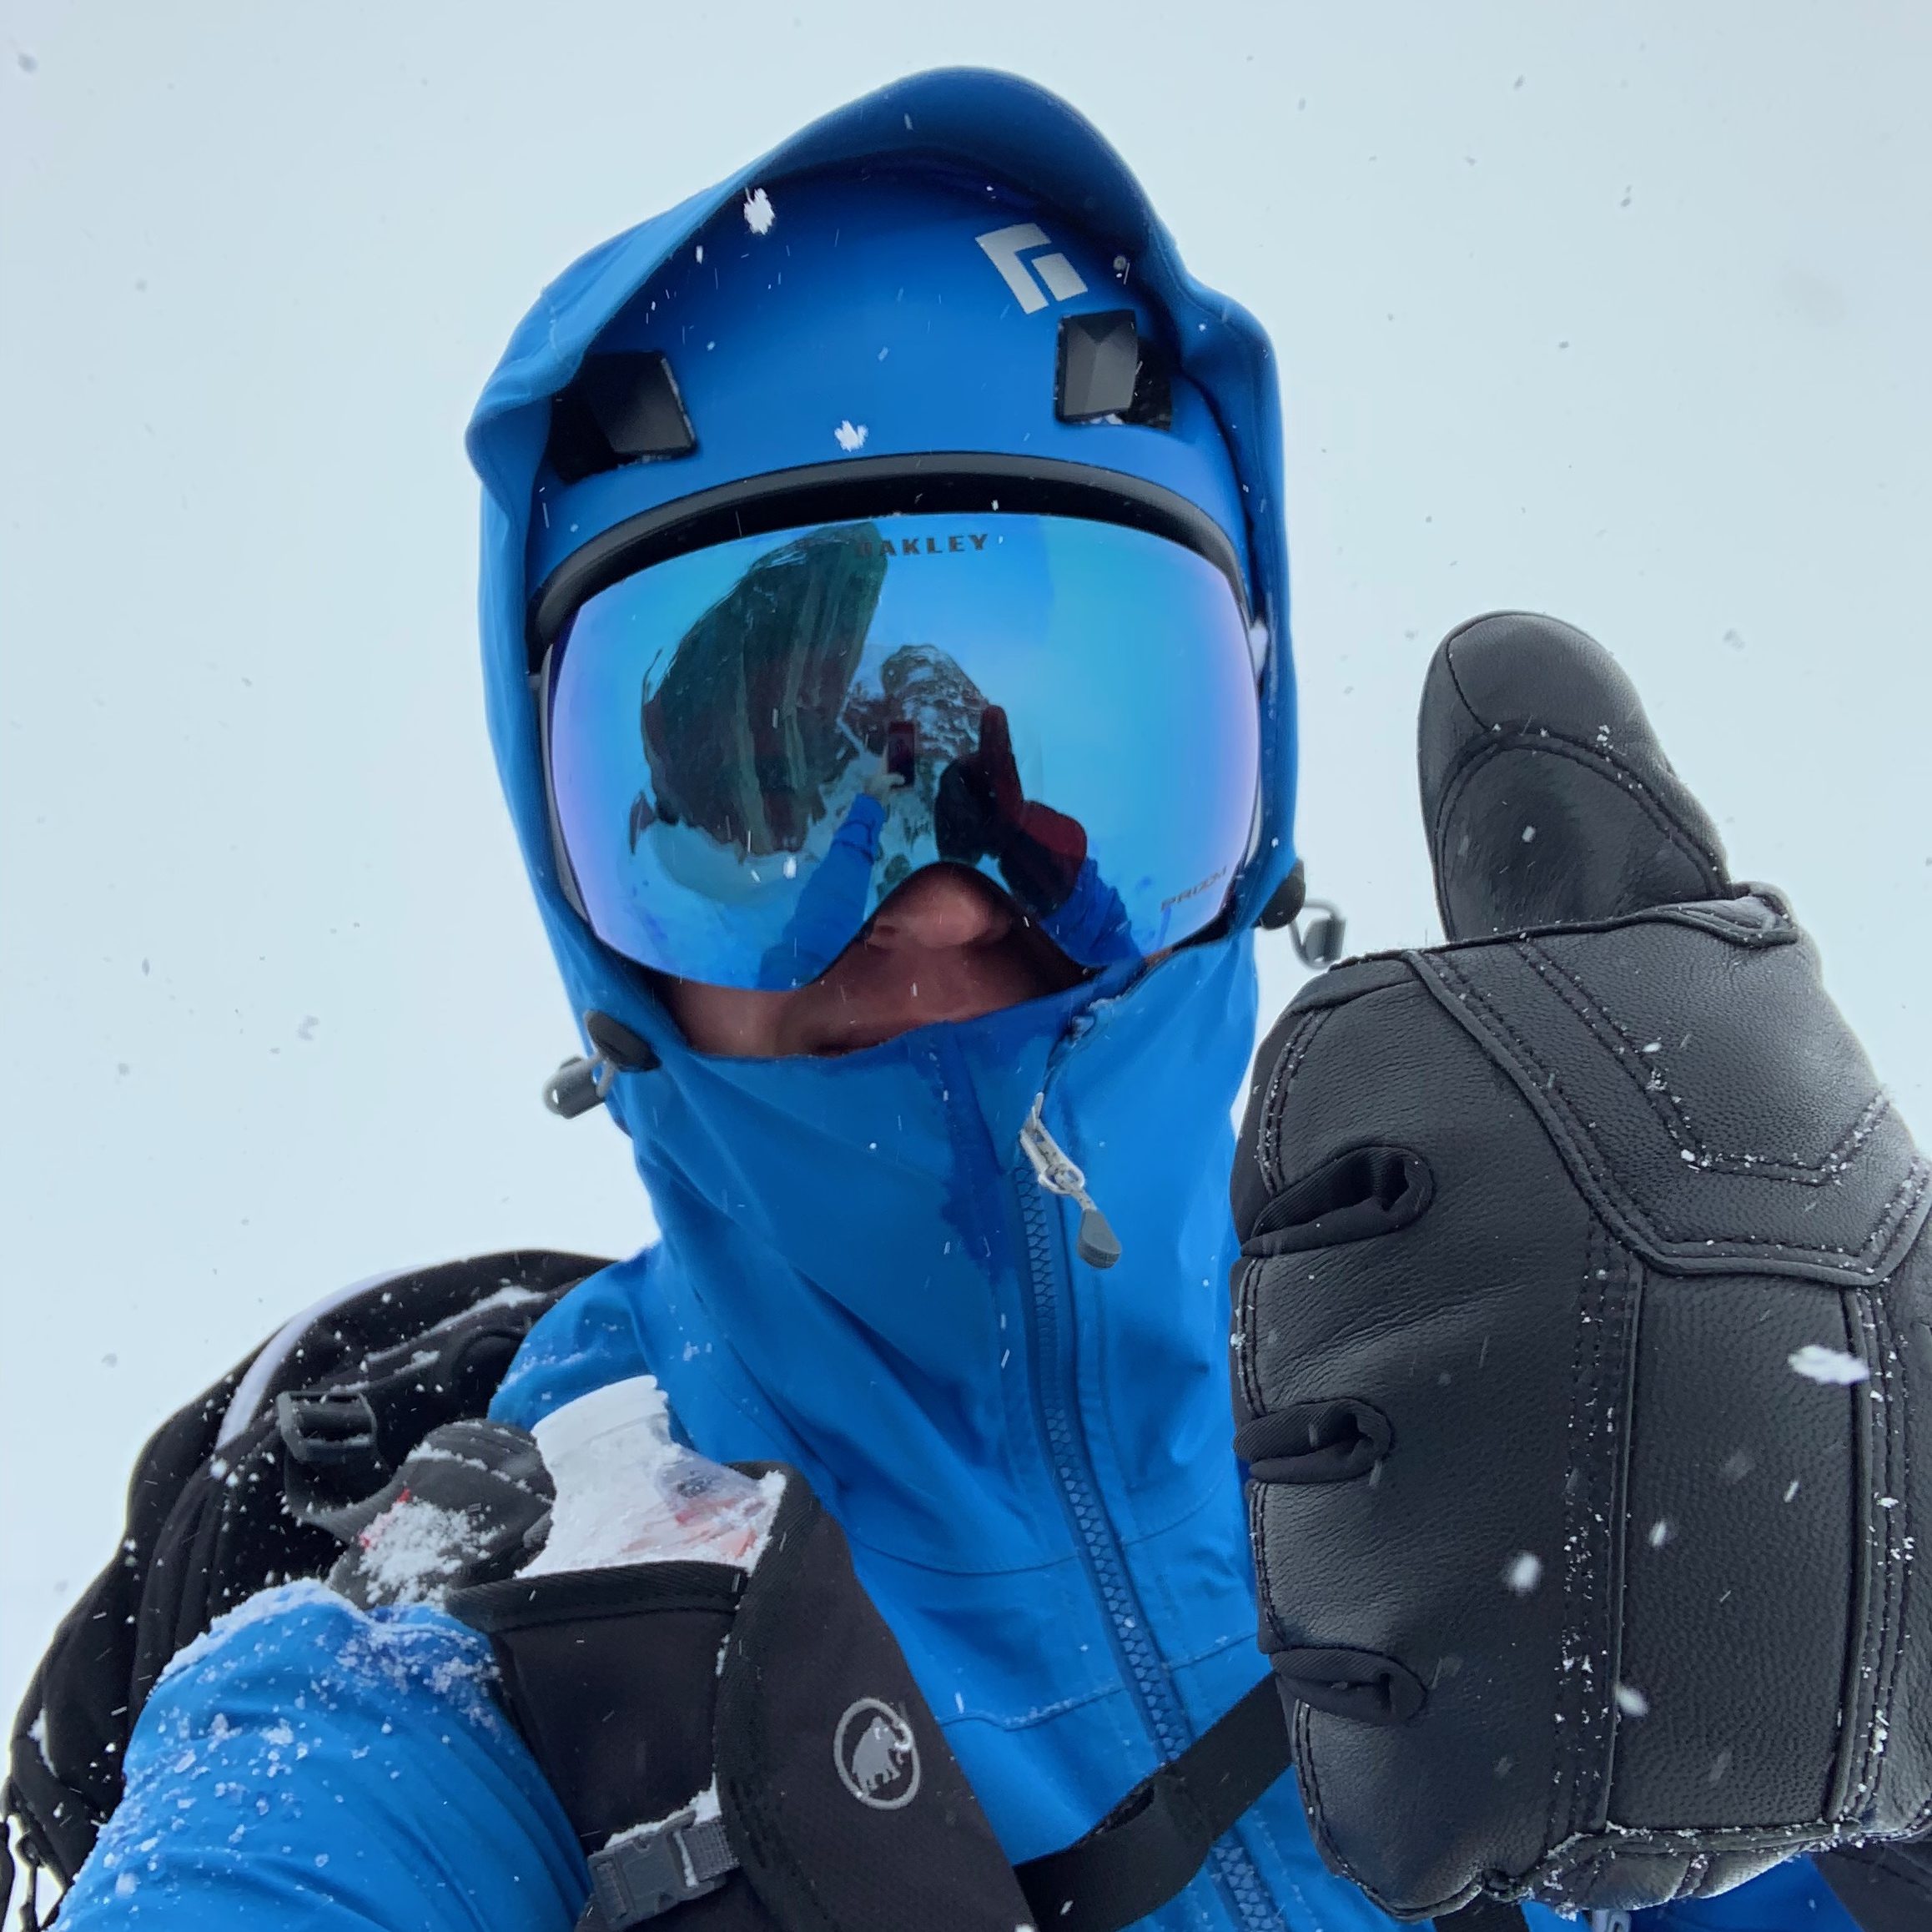
On A Remote Canadian Glacier…

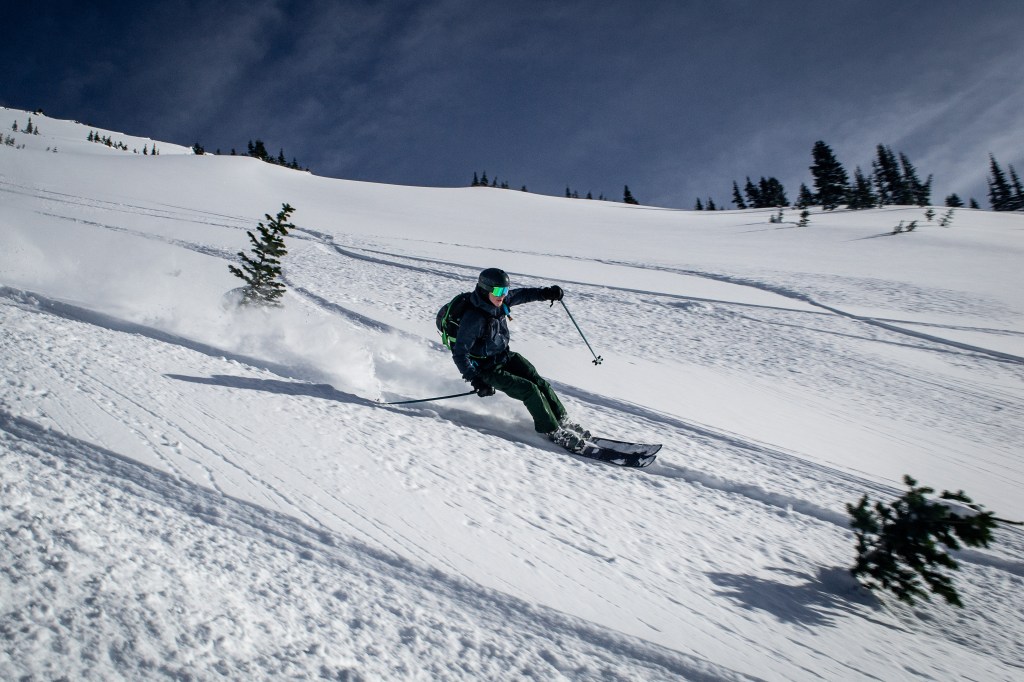
My frozen hands scrambled to unclog my ski bindings from packed snow.

Not now…

My harness and rope were irritating obstacles that just added to the hassle.

If only I could take this crap off…”

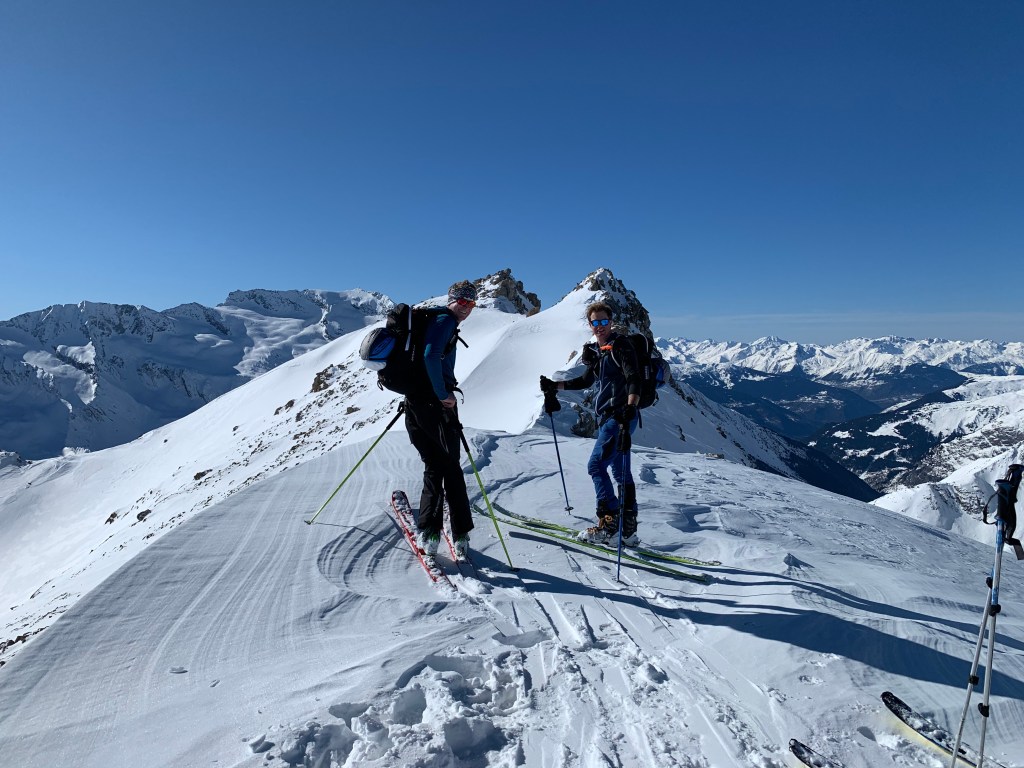
The three of us stood on a glacier we were desperate to get off. Surrounded by hidden crevasses that threatened to suck us into their depths.

The unsettling crack and rumble of an avalanche a few hundred metres to our left had confirmed that we needed to get back into safer terrain immediately.

My numb digits couldn’t get the icy-snow out of my bindings, and panic began to settle in.

A distant voice whispered to me. The memory of an admittedly terrifying sergeant who helped put me through Royal Marines training…

Slow is smooth, smooth is fast.” 

Why was this bloke’s face and voice in my mind at such an urgent time?

“Oh, it’s a lesson!”

I took a breath, detached from the situation, and slowed down.

The solution came to me, I had to melt the snow with the only warm liquid I had: my own pee.

Now I think back to that remote glacier in British Columbia, Canada, and laugh. My two friends’ faces as I began to urinate on my own skis in a hostile alpine environment was a picture.

But this isn’t a blog about tactical tips, it’s a blog about who you fundamentally are, and more interestingly, who you have the potential to become.

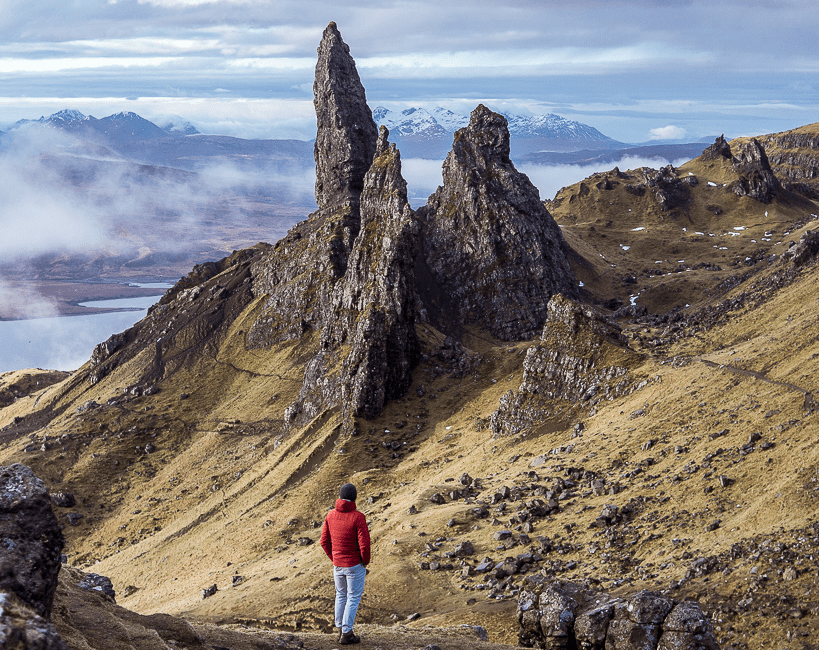
The Character Forge of Adventure

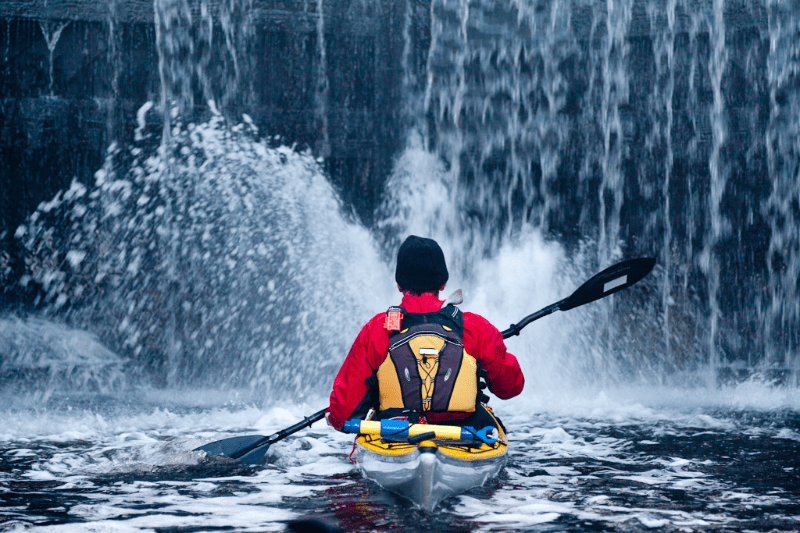
Adventure has given me far more than fun stories, epic photos and piss-soaked skis, it has given me an avenue to develop who I fundamentally am. From pub walks in a soggy English field, to an upcoming 2 week ski mountaineering trip in the Karakoram Mountains…

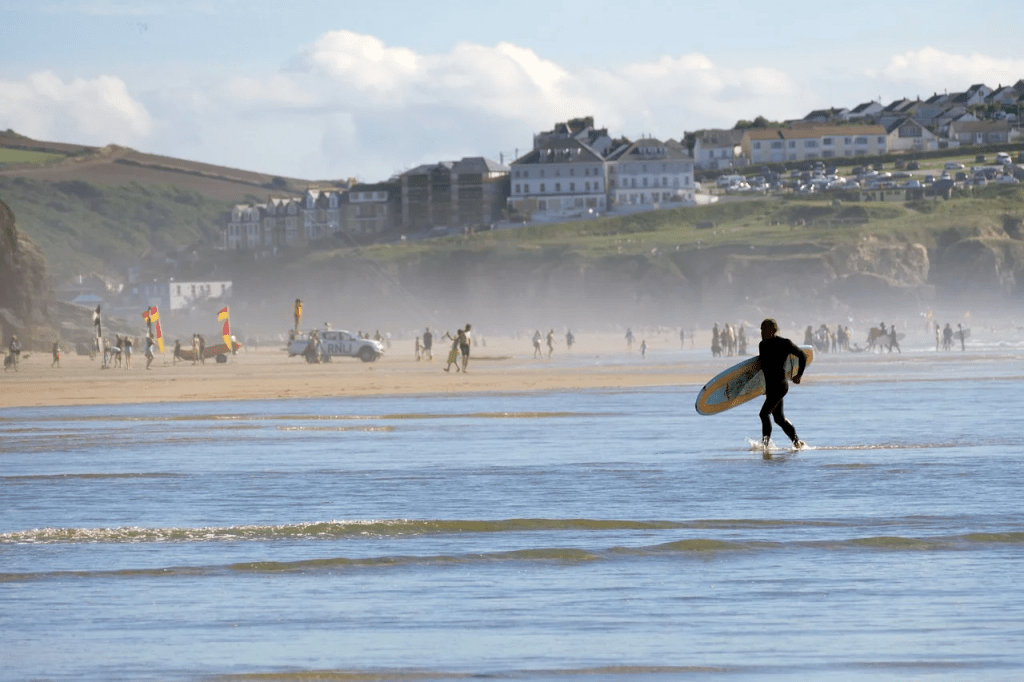
…And from the constant agony of Commando training, to teaching friends how to tie into a climbing harness with a sea sunset in the background, adventures have provided me with a forge for my character.

Mishaps are the furnace of resilience. Challenge & difficulties, the anvils of a cool, calm mind. Deep connection with nature and friends, the hearth of love.n And peak experiences a glimpse of something truly transcendent. Without adventure, I would be a fraction of the man I am today – it has shown me who I am meant to be, and I’m guessing it has done the same for you too.

But it’s my opinion that we can use adventure as a more intentional tool, rather than relying on the perfect circumstance.

The Hero’s Journey

My day job is coaching people to become who they’re meant to be. When I do this, I continually refer them to Joseph Campbell’s Hero’s Journey.

The Hero’s Journey is a narrative framework that outlines a common pattern of stages many heroes undergo in myths and stories worldwide.

It begins with the hero receiving a call to adventure, leading them to leave their ordinary world. They cross into an unfamiliar, challenging realm, where they face trials, meet allies and enemies, and undergo a central crisis.

This crisis leads to a victory or achievement, after which the hero returns to the ordinary world, transformed by the experience and often with a boon or insight to benefit their community.

The Hero’s Journey is not only a framework for every great movie you’ve seen, it’s a structure for personal development that is pre-built into every single one of us.

One of the key concepts is that once we accept the call to adventure, we are littered with progressively more challenging trials to pass.

The obstacle in front of us requires every sinew of our character and skill set to overcome.

It feels beyond our capacity.

Yet succeed in that challenge we do, which only brings us to an even greater challenge which looms in front of us; intimidating and dangerous.

But when we meet this challenge, we are not the same person we were when we planned our first hike.

That person would have been massively insufficient for a challenge of this scale. You have grown.

Yes, your skill set has developed, but so have you. You have activated parts of you that have been dormant until challenge brought them out to play.

Adventure is your most intuitive mentor, the perfect balance of maternal and paternal encouragement.

I intentionally use adventure to help myself and my clients grow.

First, we can learn to see the adventure in all of life. From becoming a parent, to aiming at career progression, it’s all an adventure.

Then we can consistently put ourselves into the environments that will extract the best from ourselves.

By answering the call to adventure, you are answering the call to your better self.

So, what’s next on your adventure list?
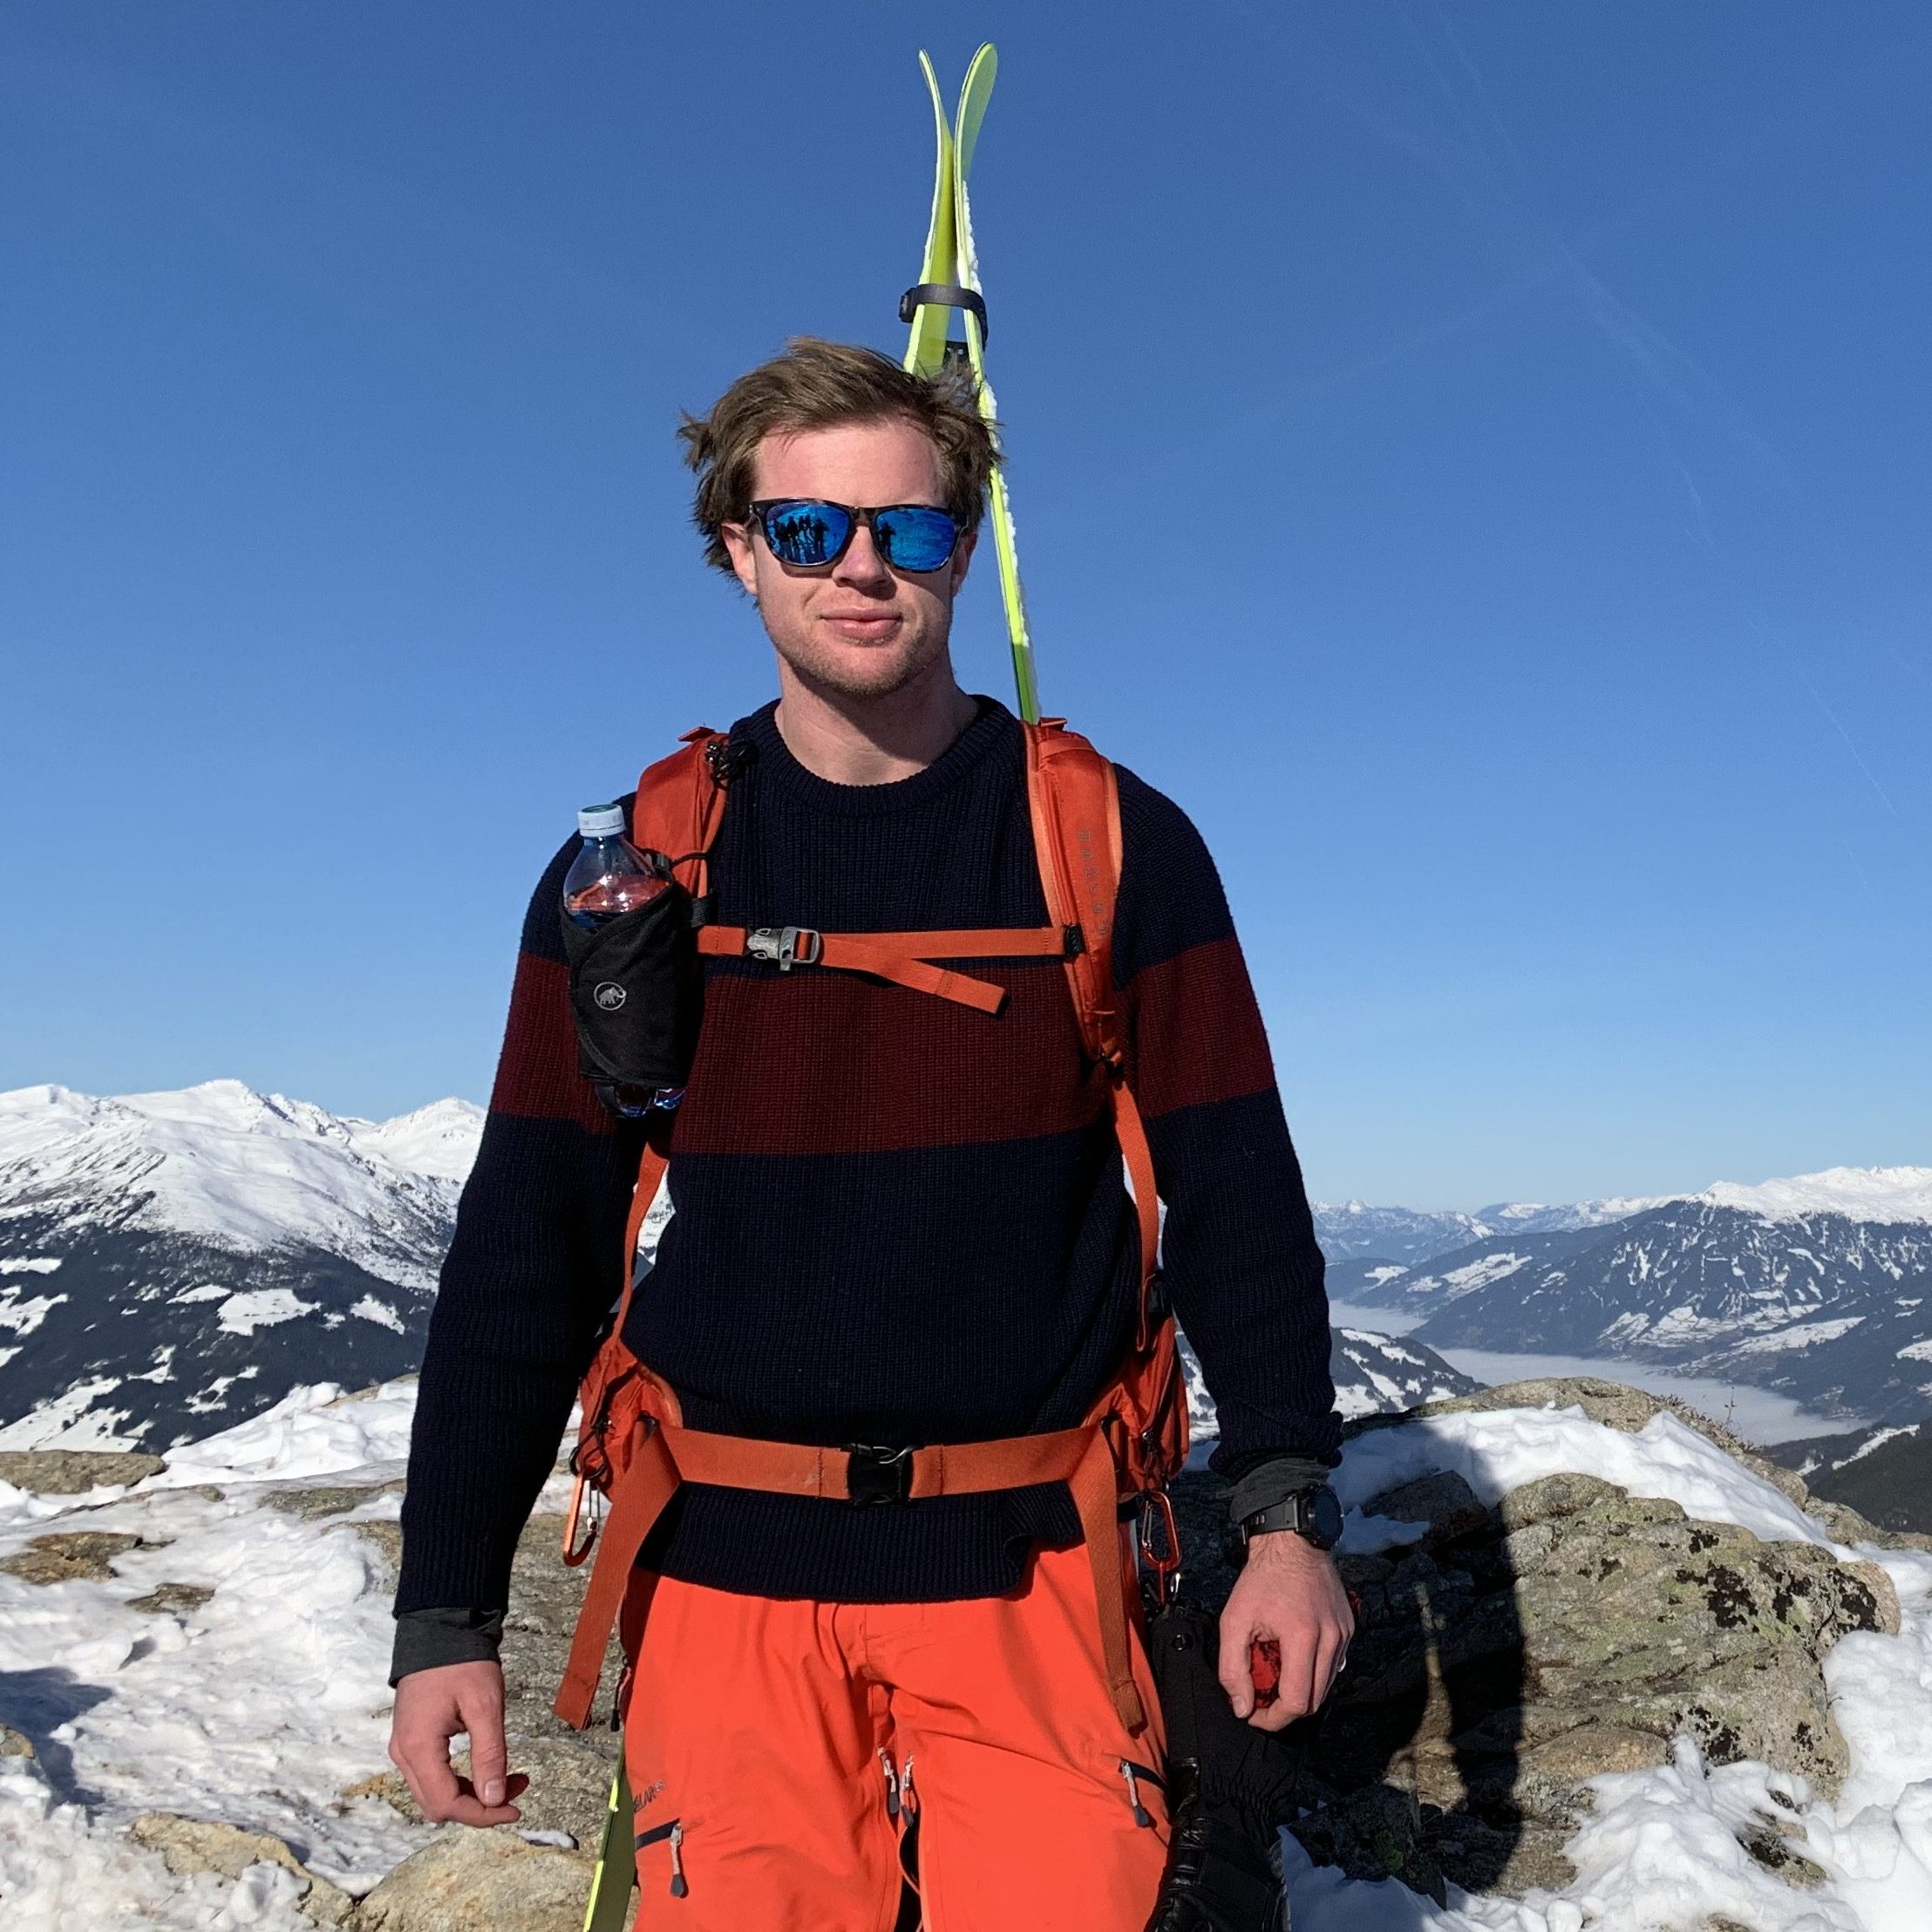
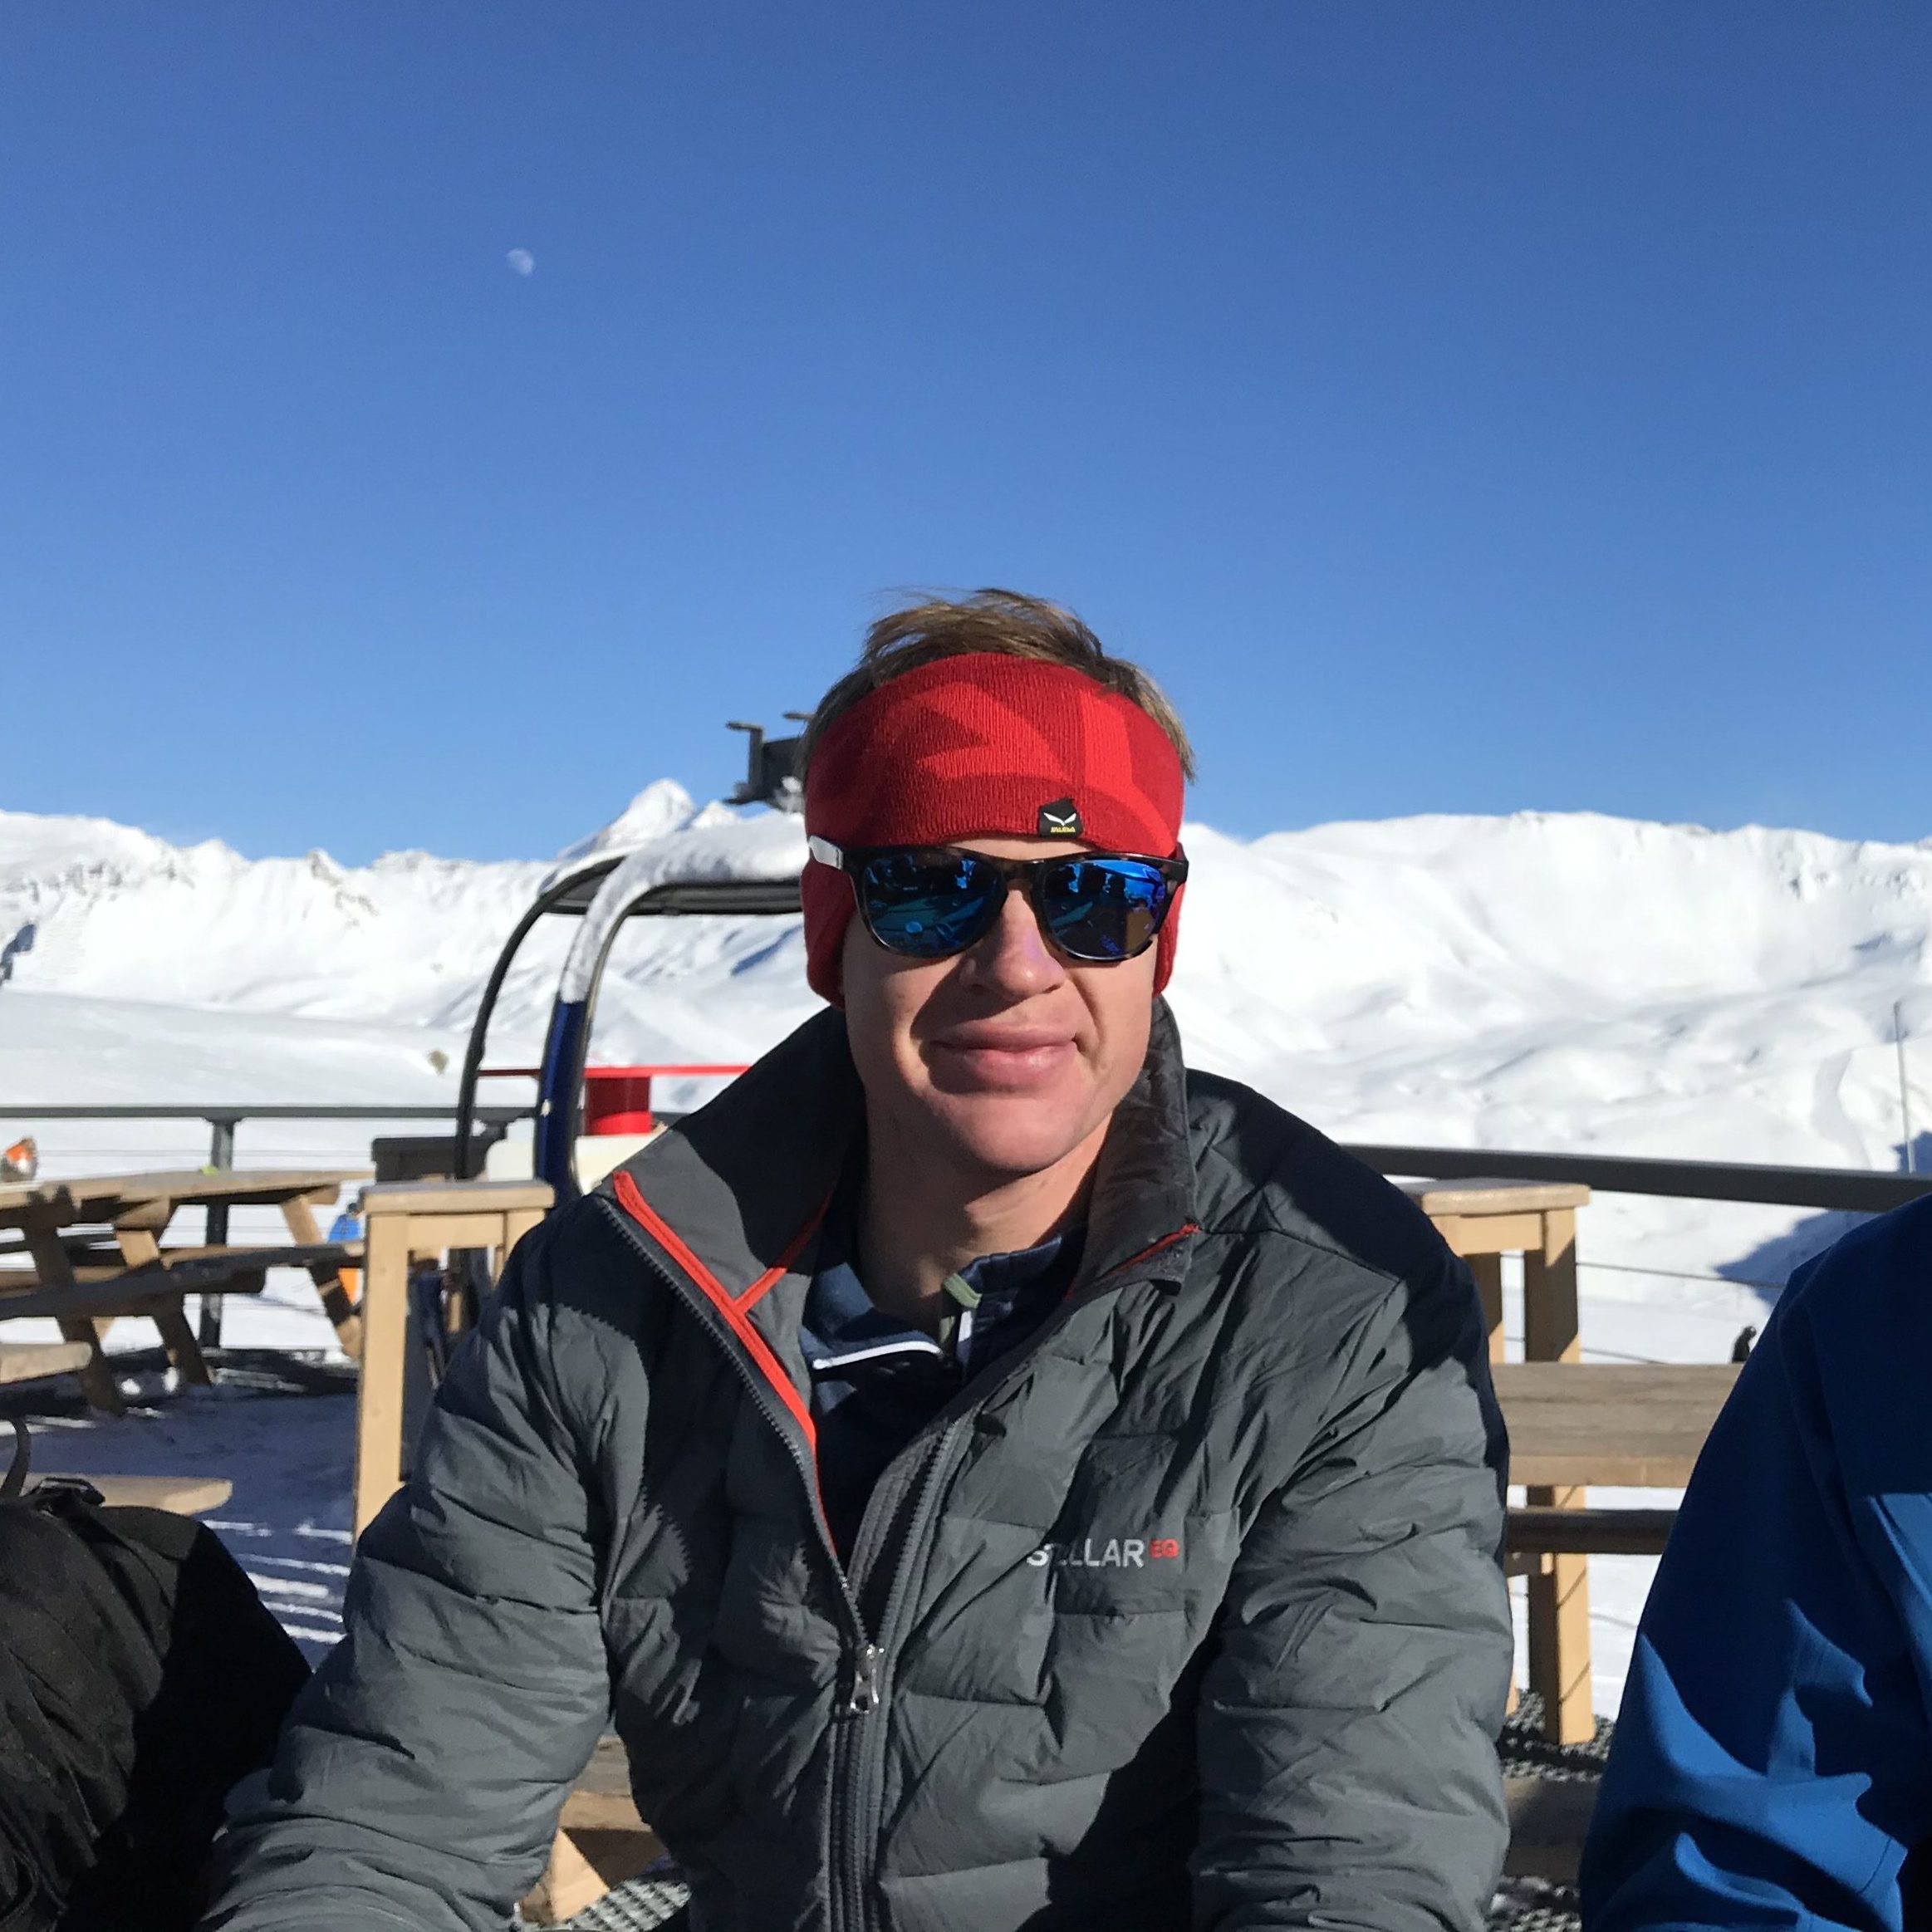
A Bit About Tom

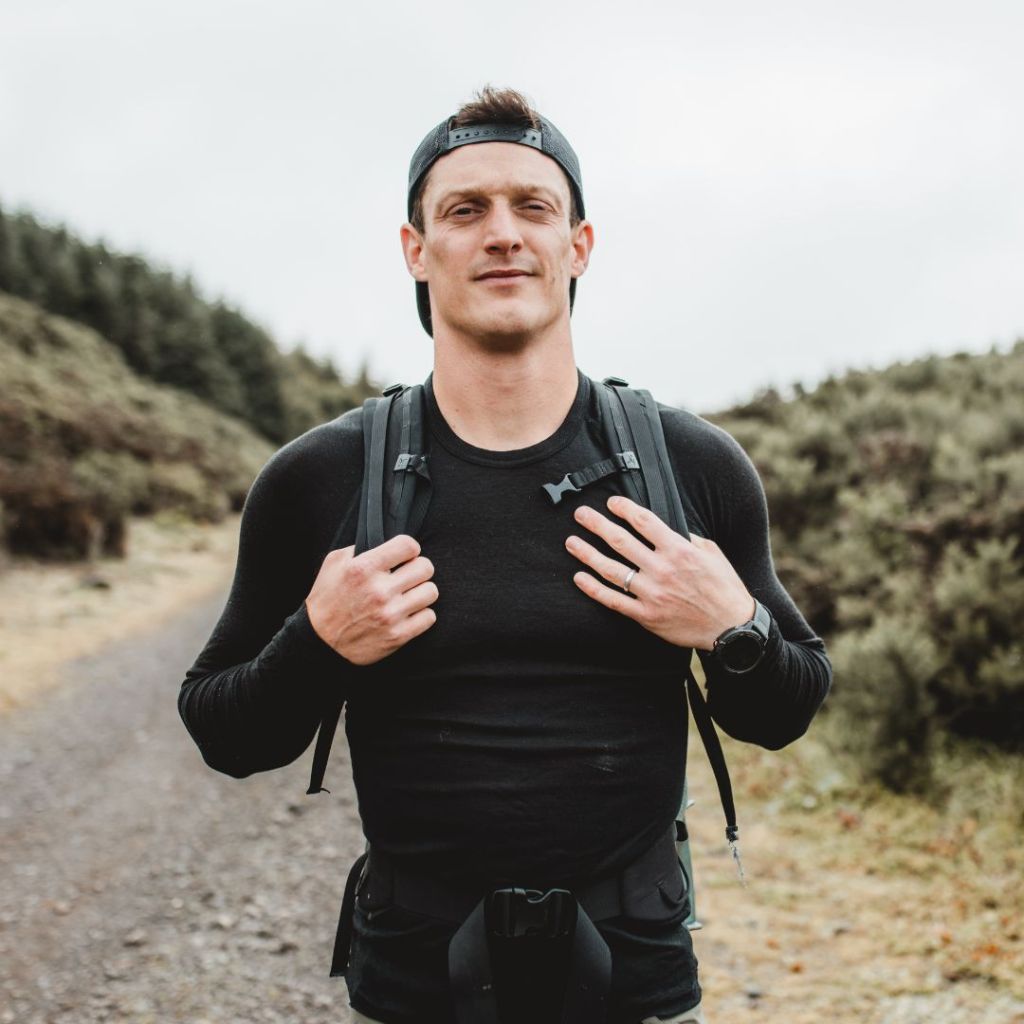
Tom Foxley helps freedom seekers become who they’re meant to be. He was formerly a Royal Marines Commando and is a skier, mountaineer, climber, and business owner. He coaches people through a combination of mindset coaching, biohacking, and actionable philosophy. For more info, connect with him at the following:

LinkedIn
Instagram

KitUp For A Winter Adventure: Climbing In The Grampians

One of the things I love more than writing about my adventures is reading about other peoples adventures! Today we have the pleasure of seeing what Ben and his friends got up to in the Grampians over the weekend.

Just 2 Scottish lads (Ben and Ryan) at the summit of Tower Ridge, Ben Nevis after an incredible climb (March 2024).

Getting Started

Hey there, fellow adventurers! I’m Ben, a lover of all things climbing and mountaineering. I came across KitUp last year and have since used it as both an Owner and as a Renter (they have a great selection of winter climbing equipment available). Having just had one of the best Scottish winter weekends I thought it would be great time to share it with the community.

The day started with an incredibly early departure from my parents house in Glasgow, where we charged ourselves with strong coffee and popped ‘Ben Nevis’ into the GPS – the goal was to summit Tower Ridge, possibly the best mountaineering route in the UK. As with any mountaineering trip (especially in Scotland) it needs some prior planning – route selection, weather checks, equipment etc and this was one of those rare occasions that all went to plan and we were able to do exactly what we wanted to.

Upon arriving at the car park just after sunrise, we were greeted by postcard views of the snow-capped peaks that towered above us and the crisp mountain air. We knew that this was going to be a truly special day out.

Ryan, trying hard not to fall into the freezing cold water at the foot of Ben Nevis (also taking a cracking photo for the Gram!).

Time To Get The Crampons On!

As we hiked up the slopes to the bottom of the climb, the beginning of Eastern Traverse, the snow started coming in hard but thankfully the winter was not too strong. This is where having the appropriate kit, especially clothing, comes in very handy. The mixture of wind, rain and snow that often characterise Scottish mountaineering require some sturdy stuff!

To begin the real climb we entered Douglas Gap a 20m groove/chimney leads to the crest of the ridge, which rises gently to become quite narrow (picture below). Whilst waiting for the others to come up behind me, it was a great time to snap a quick pic and enjoy just how picturesque the area is. It can be a busy climb but luckily, we were almost totally alone.

The Douglas Gap on the West Gully of Ben Nevis. Ben is starting to feel a little chilly at this point!

Crux Time (The Difficult Part)

After the Douglas Gap we were faced with 3-4 pitches of harder climbing on the ‘Little Tower’ which took a good couple of hours to get through. We have all done a lot of climbing so this was not beyond our ability (if relatively new to winter hiking/climbing then I would recommend getting a guide from the likes of Lochaber Guides). This was then followed by a traverse across a steep bank of snow and then another pitch of climbing to the ‘Great Tower’, which the route is named after.

We then climbed up through the chimney (image below) via a series of steep wall sections and ledges. For those not wanting to do this, there are other, simpler routes to get to the summit.

Ryan climbing The Chimney – probably the toughest part of the climb!

After popping out of the top of the chimney it’s pretty smooth sailing to the summit – time for a quick cup of tea and a picture! Doing something like this with a group of friends is one of the best experiences. It creates a bond of trust and comfort that you won’t have with too many others.

An After-thought

As I reflect on this epic day on Ben Nevis, I can’t help but feel grateful for the opportunity. I totally understand the commitment that it takes to buy and store this equipment (for most people it is used so infrequently) but for the vast majority, its deeply unnecessary if nothing else. KitUp is a really valuable resource for not only trying new activities but for anyone that is limited by what they can travel with. The ability to rent equipment ahead of time also means that you meet new people and hopefully learn about new routes!

So, to all you aspiring adventurers out there, I urge you to seize the day and embark on your own winter climbing escapade. Whether you’re a seasoned pro or not, there’s something truly special about exploring the great outdoors and pushing your limits in the most breathtaking of settings.

With equipment from KitUp and a spirit of adventure in your heart, the possibilities are endless. So go ahead, grab your boots, pack your kit, and let’s make some memories that will last a lifetime. The Grampians are calling – will you answer?

Ben and Ryan at the bottom of Little Tower, during a climb of Tower Ridge on Ben Nevis.

KitUp Community Adventures

it is so inspiring to read about other peoples adventures. To see more of what Ben is up to, you can check out his instagram profile here. If you would like to feature your escapades in our blog, please get in touch with us at info@kitupadventures.com or via any of our social media channels.

How to Adventure More Sustainably

Paddleboarding in nature

In a world where our planet’s health is at the forefront of our minds, it’s time to embark on a new kind of expedition. In recent years, the global concern for environmental sustainability has grown significantly. As outdoor enthusiasts, we have a responsibility to reduce our impact on the environment while still enjoying the wonders of nature.

As avid adventurers ourselves, we at KitUp still believe that sustainability and exploration can go hand-in-hand, but only with conscious, eco-first decision-making along the way. In this article, we’ll explore ways in which you can travel and take part in outdoor sports more sustainably.

What does it mean to adventure sustainably? 

Adventuring sustainably is the same as adventuring in general – but framed with an eco-first mindset, a set of principles that guide our actions and decisions while exploring the great outdoors. We look at the small and significant ways in which we can reduce the impact of our outdoor sports on the environment and the oceans.

It’s all in the packing

When it comes to sustainable adventures, it’s crucial to pack light and smart. Choose gear made from eco-friendly materials such as recycled polyester, organic cotton, or bamboo. Remember, quality beats quantity! Opt for versatile items that serve multiple purposes and are durable enough to withstand the test of time. 

Further, when you’re thinking of buying new for your trip, take into consideration the brands you are investing in. What sustainability policies do they have in place? How are their products made and what fabrics do they use? 

Avoid single-use plastics

Single-use plastic water bottle

Say goodbye to single-use plastics and hello to reusable alternatives. According to the UN, an ‘estimated 19-23 million tonnes end up in lakes, rivers and seas annually.’ As outdoor sports lovers, we can support the mission to reduce plastic in our seas while taking part in adventures.

While travelling, replace disposable water bottles with stainless steel ones or invest in a collapsible water bottle that saves space when empty. Ditch plastic cutlery and invest in lightweight, reusable utensil sets. By being mindful of the waste we generate, we can reduce our environmental impact and set an example for others to follow.

Choose forward-thinking locations where possible

When planning your sustainable adventure, consider the environmental impact of your destination choice. Though this may not always be possible, try to opt for places that prioritise conservation efforts, have established protected areas, or promote sustainable tourism practices. Research destinations that value the preservation of their natural and cultural heritage, and support initiatives that aim to reduce the negative impacts of tourism. 

For example, the beautiful Azores islands have been listed amongst the most Sustainable Destinations Global Top 100 regions in the world – and with so much to do and see, this adventure destination should be high up on your list! 

Similarly, Costa Rica is a leader in sustainable tourism, described as a ‘way of life’. With endless National Parks, volcanoes and rainforests, Costa Rica is a wonderful destination for your next sustainable adventure.

Aim to leave no trace

One of the golden rules of sustainable adventures is to leave nature as you found it, if not better. We recommend following the 7 principles of the ‘Leave No Trace’ movement, which are:

  1. Plan ahead and prepare
  2. Travel & camp on durable surfaces
  3. Dispose of waste properly
  4. Leave what you find 
  5. Minimise campfire impacts
  6. Respect wildlife
  7. Be considerate of others

We also highly recommend that you use established trails for hiking/cycling, as to not disturb natural habitats.

Choose eco-friendly transportation

Getting to your adventure destination is part of the excitement, but it’s crucial to consider the environmental impact of your travel choices. Opt for public transportation, carpooling, or eco-friendly vehicles whenever possible. 

By hiring on KitUp, you can reduce your environmental impact when travelling by not having to take your kit on your journey with you, saving space on your journey for more people instead. Further, on arrival, why not explore your surroundings on foot or by hiring a bike on KitUp? This environmentally-friendly method of travel is not only healthy for the planet, but for you too. 

3 Best South-West Adventures for Summer 2023

As the summer of 2023 is in full swing, it’s time to ‘KitUp’ for some adventures in the South-West! This picturesque corner of the United Kingdom offers an array of beautiful destinations to explore, from the vibrant city of Bristol to the rugged coastlines of Cornwall and Devon. Whether you’re a seasoned adventurer or a curious traveller, we’ve got you covered with so much to see in these well-loved locations, as well as some top kit recommendations for each location.

Explore the waters of Bristol

Kickstart your South-West escapades with a visit to the vibrant city of Bristol. This cultural hub boasts a captivating blend of history, modernity and artistic flair, making it an ideal destination for all types of adventurers. 

Paddle on gentle waters

Start off in Clevedon Marine Lake, a safe bet with gentle water to keep you up on your feet. This Body Glove Performer inflatable paddle board comes with both an electric and hand pump for each inflation, paddles and a carry bag for convenience with simple pick-up in Bristol.

paddleboard in Bristol

Coast along the River Avon

If you’d like an alternative view, the River Avon is an earth location to be-at-one with nature. Simply head to Bristol and rent this ready-to-go 11ft inflatable blue paddleboard through KitUp. Not only is it stable and easy-to-handle, but it’s a generous size for cruising (or surfing small waves if you head to alternative beach locations). Collection is in the heart of Bristol and packed up in a convenient bag for ultimate exploration.

Paddleboard with rucksack for easy portability

Take Cornwall by bike or board

Next on our list is the captivating coastal beauty of Cornwall, a paradise for beach lovers and nature enthusiasts alike. With its coastal waters and trails awaiting to be explored, there’s endless adventure. 

Whizz through Lizard

Zip along the coast and loop back through the Lizard National Nature Reserve with this Giant Rove Liv Women’s Hybrid from the amazing team at Lizard Bike Hire. Venture with enhanced comfort and control, courtesy of a suspension fork and reliable disc brakes that ensure you can maintain your speed, even when facing wet weather conditions. 

Bike to rent in Lizard

Hit the waves of Fistral Bay

Power through the rapid waters of Fistral Bay with this Nigel Semmens Hazzatron shortboard surfboard, courtesy of Fistral Surf School. Ideal for hollow, faster waves for the ultimate beach adventure. With collection from Fistral Bay, it couldn’t be any easier. The team are also incredibly talented so if you have never surfed before, pop in and say hello!

Surfboard to rent in Fistral Bay


Embrace the wonders of Devon

Lastly, head into the captivating landscapes of Devon, where rolling hills, endless countryside and charming villages await. Whether you’re a hiking enthusiast eager to conquer Dartmoor National Park or want to pedal through the streets, KitUp has everything you need. 

Opt for a weekend away in Dartmoor

Start by hiring the Vitesse e-bike powerhouse, with effortless navigation and exploration. Benefit from a 40-mile range to allow robust investigation of the beauty that Dartmoor National Park has to offer, as well as upgraded tyres, seat, grips, saddle and bar bags. 

e-bike to hire, Devon

Level-up with an overnight camp

We could not be happier that the ban on Wild Camping (camping without written permission from the land owner) has now been lifted!! We can pack our tents and enjoy the quiet, incredibly starry skies and the early morning views of the Moor. Why don’t you set up camp with this 3-4 man, all seasons tent. Designed to withstand extreme weather, you’ll be guaranteed a good night’s sleep. The Zhota also features plenty of interior pockets for storage, vestibules to keep your shoes and gear away from the living space, as well as colour-coded poles for fuss-free pitching. 

Tent to hire in Devon

KitUp for your Bristol, Cornwall or Devon adventure now

With Bristol, Cornwall and Devon offering a diverse range of experiences, you’re in for an extraordinary summer adventure in the South-West region. Whether you choose the bustling city life of Bristol, the coastal charm of Cornwall, or the tranquil national parks of Devon, head to KitUp today to remain sustainable, whilst also ticking things off your bucket list.

Sustainable Summers: Best Festival Tents 2023

As the summer festival season heats up, it’s time to prepare for unforgettable experiences under the open sky taking in the vibrant atmosphere among a buzzing crowd. However, amidst the excitement, it’s important to address the environmental impact of festivals, particularly in terms of tent wastage.

In this blog, we’ll be discussing the impact of tent waste, as well as guiding you through the best festival tents, while keeping the environment in mind. We’ll explore different tent functionalities, recommend top picks and discuss how renting tents can improve sustainability. 

Tents and Festivals: Current Practice

The Association of Independent Festivals (AIF) estimates that around 250,000 tents are abandoned at music festivals across the UK each year. On average, a tent weighs 3.5kg and is predominantly made of plastic – the equivalent of roughly 8750 straws or 250 pint-size cups, according to AIF. This is clearly a huge amount of waste! We certainly have some improvements to make. We believe it’s crucial to embrace more sustainable approaches to reduce this impact and create a positive change. But, how can we start the movement? 

Here at KitUp, we have a huge array of tents for hire. From tents to hire near Boardmasters, to pop-up tents to rent for Leeds Festival, there’s a tent for every occasion. Then, once the fun is over, simply pack up your tent, hand it back to the owner and head back home for some rest and relaxation (let’s face it, you’ll need it after a festival full of entertainment!)

Which tent is best for a festival?

When it comes to choosing the best tent for a festival in the UK, several factors come into play. The ideal tent will depend on your specific needs and preferences. Consider factors such as the number of people sharing the tent, desired comfort level, ease of setup, durability and weather resistance. 

Spacious family tents are great for groups, while lightweight and compact tents work well for solo festival goers, or those attending as a duo. Additionally, tents with good ventilation and waterproof features are essential for unpredictable festival weather. By assessing your requirements and considering the recommendations in our guide, you’ll be well-equipped to select the perfect festival tent for an enjoyable and comfortable experience.

Spacious Festival Tents for Hire

For festival-goers attending with their families or larger groups, spacious family tents are an excellent choice. These tents offer multiple rooms or separate sleeping compartments, providing privacy and ample space for everyone. Look for tents with a high peak height to allow for comfortable movement inside. Many family tents also feature built-in storage pockets and additional features to enhance your camping experience to make it as comfortable as possible.

If you’re heading to Boomtown this summer with a group of friends or family and need a tent to hire, this tent might be the ultimate choice for you. It comfortably sleeps 4-6 people and can even come with additional accessories on request. 

4-6 Person Quecha Tent to Hire
4-6 Person ‘Quechua’ tent to hire near Winchester

This one’s an ideal tent pick if you’re heading to Reading Festival or Boomtown Festival. It’s situated slightly further out but you could factor in collection while making your way to the event. Based in Basingstoke, this quick-pitch inflatable tent for hire is ideal for groups of 6 and provides a huge amount of room to safely secure your belongings for the duration of the event. 

6-Person ‘Berghaus’ tent to hire near Basingstoke

Lightweight Festival Tents for Rent

If you’re planning to attend a festival as a solo traveller or prefer a more lightweight setup, backpacking tents are worth considering. These tents prioritise portability and ease of carrying, making them ideal for those who have a little distance to walk before setting up camp. If this sounds like your situation, we recommend looking for tents made from lightweight materials. Not only do they benefit from being easy on your back, but they won’t compromise on durability or weather resistance. These tents are typically easy to set up and pack down, allowing you to spend more time enjoying the festival.

Need a tent to rent for Boomtown Festival? This 1-person backpacker tent is the perfect solution for a solo attendee, or if you’re going with a group but want your own space to rest your head as it’s available to hire from Alton, perfect to pick up en-route. With a simple set-up, you’ll be heading towards the stage in no time. 

1-Person Backpacker Pro tent to hire near Alton

Paying a visit to All Points East this summer? Check out this ultralight 2-person tent. Available to rent and collect from Hoxton, it’ll be the perfect fit and allow you to travel across London with ease.

2-Person ‘Vango Force’ Ultra-Light Tent to hire in London

Quick Pitch Pop-Up Festival Tents to Hire

For festival-goers seeking convenience and ease of setup, pop-up tents are a popular choice. These tents come with pre-attached poles that can be easily unfolded and set up in a matter of minutes. They are perfect for those who want to spend less time assembling their tent and more time enjoying the festival atmosphere. 

Heading to Boardmasters Festival this summer and need a tent to hire for a small group? Check out this 3 person pop-up tent in Cornwall. It fits perfectly in the car and can be hired from Cornwall.

3-Person Pop-Up Tent by Quechua

All-Weather Festival Tents to Rent

Festival weather can be unpredictable, so investing in an all-weather tent is a smart choice. Look for tents specifically designed to withstand various weather conditions, including rain, wind and even extreme heat or cold. These tents often feature robust rainflys, sturdy poles, and durable fabrics to keep you protected and comfortable in any climate. Ventilation is also crucial in all-weather tents to prevent condensation buildup. While it might take a little longer to erect, it’ll certainly provide peace of mind for protected sleep during a festival. 

This 4 season’s tent is one of our favourite picks if you’re going to experience the fun of Boardmasters this summer. Available to collect from Devon, this 3-4 man tent can be hired so you know you’re supporting the environment, whilst also having a great time. 

3-4 Person ‘Alpkit Zhota’ Tent to hire in Devon

How Renting a Tent for Festivals Can Improve Sustainability

In light of the significant tent wastage at festivals, we strongly advocate for renting tents as a more sustainable alternative. Renting not only reduces waste but also allows festival-goers to enjoy high-quality tents without the long-term commitment of storing a tent, or the cost it can incur to purchase new. 

How Much Does a Festival Tent Cost?

This question can be quite complex to answer as it completely depends on the type of tent, size, quality and functionality. If you’re looking for a cheap tent to purchase brand new, you could be looking at spending from £30. However, with this low price, comes compromises. You’ll likely be receiving a tent that has low or limited durability, meaning you might end up getting a damp tent throughout your festival stay, or very little comfort and space. If you’d prefer something more luxury, you can expect to spend £1000’s. However, renting a festival tent allows access to a wide range of higher-quality tents, at a fraction of the price. 

At KitUp, our online platform currently has tents to hire from £7 per day. Explore what our renters have on offer today and head to our online platform. 

To conclude, it’s crucial to consider the environmental impact of tent wastage as you prepare for your upcoming festival adventures. By choosing sustainable options like renting festival tents, we can collectively work towards minimising waste and preserving our planet. Whether you’re camping with family or venturing solo. Let’s embrace the festival spirit responsibly, explore new locations, and make lasting memories while keeping the environment in mind.

Ready to hire your perfect festival tent and make a positive environmental impact? Visit KitUp now to start your sustainable festival adventure in comfort!

The London Adventurer II

For the second of our three part series, we explore in and around London on two wheels. We will take you from the instagram worthy sites along the Thames to out-the-saddle climbs on Box Hill. Whether you are the most recreational cyclist looking for a fun Saturday afternoon or whether you are desperate for a new training route, we have you covered. As always, we would love to hear from you about your favourite routes in London.

1. London to Brighton

Distance: 87 km (one way) 174 km (return trip)

Difficulty: Hard (one way) and very hard (return trip)

Start Point: Richmond Park

London to Brighton is now one of the most popular cycling routes in the area. The most famous event is the annual ‘London to Brighton’ charity race, where all proceeds go to charities of your choice. It has been running from 1976 and has grown from a group of 34 people to over 14,000 now! There is something quite novel about cycling south from the Capital City, and not stopping until the sea won’t let you go any further.

There are lots of places to start but we like to start from Richmond Park, then follow the the route (GPX file here) through the Surrey Hills and the South Downs. When you reach the mighty Ditchling Beacon, you only have one big push before it is downhill all the way to the finish!

As you get to the beach you will be rewarded with a host of fantastic eateries and bars. There are plenty of deck chairs on the beach so grab yourself a drink and celebrate (be aware of the seagulls!). When ready to leave, its a 5 minute cycle to the main station and then a £12 ticket back into London.

2. Richmond Park

Distance: 12 km per lap

Difficulty: Medium

Start Point: Roehampton Gate

Richmond Park is the largest green area within Greater London. It is the preferred training location for many cyclists in the city. It has hills, beautiful landscapes, plenty of wildlife, a couple of great coffee-stops and is easy to get to. If you arrive between 7am and 9 am (particularly at the weekend) so will often see the professionals out training too as they fly by you!

Richmond is not only a great place for road cycling but has a stunning gravel route and is also fun to explore on mountain bike. There is a cycle rental shop close to Roehampton Gate and their proceeds go to maintaining the park and the cycle infrastructure. If you have a family it is also a great place to have a walk and get a little bit of fresh air – something that is becoming harder to find in many parts of London!

3. Hampton Court Palace to Windsor Castle

Distance: 60 km

Difficulty: Medium

Start Point: Hampton Court Palace (near Kingston)

You can either start cycling from home and make your way to Hampton Court or you can take the train and start there. The Overground services are incredibly easy to use with bikes (unlike many train operators now…). This route starts and finishes with a marvel of British Architecture and History. Hampton Court was the home of Henry 8th and the deer park was his personal hunting ground! Windsor Castle was the home of Her Majesty The Queen, now King Charles. If you start early and get to Windsor before 11am you can also enjoy the Changing Of The Guard Ceremony which happens every day!

As you head off, use the National Cycle Route 4 which will take you along the river all the way out to Windsor Great Park. Feel free to spend some time exploring (stay on the roads or you will get shouted at!), a bite to eat and glorious views of the Castle! As you leave Windsor you will say wave goodbye to Route 4 and cycle to the Queen Mother Reservoir. From here you will cycle past London Heathrow Airport and then along the road directly back to the front of Hampton Court Palace. Well done!

Get the GPX route here.

4. Battersea Park To Greenwich

Distance: 16 km

Difficulty: Easy

Start Point: Battersea Park

We are back on National Cycle Route 4 but this time we are heading west! This is a real leisurely ride that can be done on anything from a Santander (Borris) bike through to your time trial racing machine (if you really want). Make sure to get some great video as you cycle by the London Eye, the Globe Theatre and the Tate Modern – all of which you can stop off at if you are in tourist mode. This route is generally low-traffic meaning that you can really relax and enjoy it. If you’re feeling peckish make sure to hit the famous Borough Market for some classy street food coming from all over the world. Once fuelled and on the road, it’s a gentle cycle all the way to the Royal Observatory at Greenwich.

5. Thames Valley Cycle Path

Distance: 160km

Difficulty: Hard

Start Point: Putney Bridge

This one is in here for the real adventurers out there! This is either a long day in the saddle or a lovely thing to do over a weekend. Once again we are taking use of the traffic free zones of the National Cycle Network and following it from Putney Bridge, through Thames Valley and out to Oxford. More than half of the route is completely traffic free!

Most of the route is pretty flat until you get to the Chiltern Hills (close to Oxford). Here you can choose to spend some time exploring the area and add some elevation, or you can take the direct route along the path and take yourself to Oxford for some well earned grub!

Get the GPX file here.

Thanks for reading!

We always love to hear from you so if there is anything that you want us to write about, or want help planning your next adventure, we are here to help! Get in touch Here.

See you out there!

Bruce

https://www.instagram.com/kitupadventures/

The London Adventurer

Welcome to the first part of The London Adventurer! We all know how to find cool coffee houses, swanky restaurants and the latest art installations, but do you know the best places to paddle or cycle in and around London?! Don’t worry, that is what we are focussing on in our 3 part series “The London Adventurer”. In Part 1 we explore London’s water-ways by SUP, kayak and canoe.

St Katherine Docks

This really is a hidden gem in the middle of Central London, a stone throw away from Tower Bridge (you can see the Shard in the background). Of all the locations in this post, this is the most beginner friendly with the perfectly calm water being very easy to explore. This is where many of London’s elite keep their boats, so be prepared to see some rather blingy yachts in the Marina.

In the summer, the area is a total sun trap and protected on 3 sides from any breeze. It is the perfect place to catch some rays in super quick time. There are so many bars and restaurants around the Marina to enjoy post-paddle.

Kit: KitUp already has Paddle boards in London to hire, so check out some of our users. If you are looking to get on a tour or have a lesson in the area, we recommend using Paddleboarding London.

Getting there: The closest tube station to St Katherines Dock is Tower Hill – about a 10 minute walk away. The area is also incredibly well connected with buses and you can also get there easily by foot/bicycle using the Thames footpath.

Thames Ditton

This is by far our favourite place to paddle in SW London. There are so many little waterways to explore and the scenery is stunning. 2 brilliant launching points are at Ye Olde Swan pub and Albany Thames Ditton (another pub!). Clearly there are very good reasons to finish your paddle here.

If you only want a short route, you can paddle out and around Thames Ditton Island, admiring the beautiful island houses. For a slightly longer paddle you can head to Hampton Court Palace or for those that really want to feel the burn, paddle to Kingston Upon Thames and back – that will certainly work up your appetite for lunch!

Kit: There are paddle boards to hire in the local area but you can also head over the Dittons Paddle Boarding for group activities, 1 on 1 coaching and taster sessions.

Getting there: There are direct trains from London Waterloo to Thames Ditton every 20 minutes or so and the journey is less than 35 mins. From there it is a 5 minute walk to the river

Regents Canal & Hertford Union Canal

This is the route for you if you want to spend the day paddling through the middle of London without feeling like you are in the middle of London! There is so much variation here – you can paddle through the built up areas of Angel and Hackney or you can enjoy the River Lea and the Hackney Marshes.

This is our route recommendation starting near Angel Tube Station and finishing 3.5 miles later at the Crate Brewery, a micro brewery and pizza restaurant (see below). There is plenty of place to stow kayaks and paddle boards and it is well worth the trip! You can then make the trip back the same way that you came, or take the overground train (if you have inflatable SUP’s/kayaks with you that is!).

Kit: Chris’s Kayaks are perfectly placed at Rosemary Gardens for this adventure. He has a great mix of paddle boards and kayaks that can be hired straight for a half day or full day.

Getting there: The 2 closest tube stations are Angel and Haggerston. It is about a 15 minute walk from Angel or a 10 minute walk from Haggerston. Alternatively, you can paddle directly from Angel if you want to. There are also lots of buses in the area. For those that want to take public transport back (especially after enjoying the samples from Crate brewery), you can take the overground from Hackney Wick directly to Haggerston (15 minutes max).

Windsor to Runnymede

Although this is not in London it is incredibly easy to get to and a must do for anyone that has either not been to Windsor before or are just looking to escape the city for the day.

The paddle starts in the beautiful town centre. If you are there first thing in the morning you might even catch the Household Cavaly out exercising their horses or you can see the famous Changing Of The Guard at Windsor Castle at 11.00am every day. You can then hop onto the river and paddle all the way out to Runnymede.

In this area the River Thames tends to be incredibly calm and peaceful. We have done this route a handful of times and it has always delighted. If you want a shorter route you can get off at Datchet and walk back across the river or you can paddle down to the Bells of Quzeley and get the bus back to Windsor. Another option (easier when driving) is to start here, at the Runnymede cafe and paddle in towards Windsor. All of the options!

Kit: If you are travelling from London, grab yourself an inflatable SUP board that comes with a rucksack (this is a real adventure) and take it with you on the train/car out to the starting point. You can also hire and get lessons from Just SUP UK.

Getting there: There are lots of trains that go directly from London to Windsor. You can travel from Clapham, Waterloo or Paddington. Some will have a change so be careful not to miss that! This shouldn’t take much longer than an hour and is well worth it.

Photo below from GoPaddling.

Paddington Basin

Now then, if you’re kind of day involves oat milk cappuccinos, some luxury shopping, a spot of paddle board yoga and a glass of champagne, Paddington Basin is the place for you!

Kit: You can book paddle board yoga sessions directly through Active 360 but if you want to explore the waterways at your own pace, then pick up a board from a local via KitUp, any time!

Getting there: Paddington is one of the best-connected stations in London so it is incredibly easy to get to. From the station, Merchant Square is less than a 5 minute walk past countless bars and restaurants. Its a very trendy place to be and a lot of fun!

Thanks for reading! Stay tuned for London Adventure Series Part 2: Two Wheels Are Better Than None. Check us out at any of the following social links 🤙

Outdoor Equipment: The Benefits Of Rental

When we started KitUp we wanted to make a better solution for 2 groups of people: those that already own lots of outdoor kit, and those that do not. Yes…that means everyone!! We had enough of being limited to rubbish rental kit (or having to pay through the nose for ‘premium rental packages’) nd also know the faff and the limitations of travelling with your kit. With that in mind, we decided to do something about it.

Let us tell you how we have made your life just that little bit easier. First we will take the position of the kit owner, then we will talk about the kit renter. Here goes.

Challenges For Kit Owners

If you have ever found yourself in any of these situations (or similar) you will be all too familiar of the difficulties of travelling with outdoor equipment. From international travel through airports to local travel by car or train, taking our much loved kit is sometimes more trouble than its worth (although we rarely acknowledge this).

Having spent years travelling with bikes, surfboards and skis on flights, here are a few of the situations that I have found that made me think about alternate solutions.

  1. Surfboard damage. A few years ago I was in South Africa on a surf trip and found the board that I had been looking for, for years. A beautiful fish with glassed-in find (they cannot come out) so I bought it and quickly fell in love with it. When flying back to London Heathrow I spent about 3 hours wrapping it in memory foam, bubble wrap and then into a board bag. When I got home there was serious damage in 3 locations and I was devastated. Luckily the talented Ding Doctor in Bristol was able to save it.
  2. Long travel times. On a trip to the south of France for some skiing and cycling we decided to drive because we had far too much kit to take the train or try and fly. This added an extra day on either side and became far more expensive than expected. When you add up the fuel costs, ferry or train, tolls through France and food/water throughout the day it adds up very quickly. We realised that even if we used the ‘premium rental packages’ the cost would have been about the same, minus the travel faff!
  3. Outdoor kit evolves quickly. When most of us make the exciting decision to invest in new kit, it’s usually because we are about to go away on a trip, so convince ourselves that its worthwhile. However, the next use can often be many months away and by that time, newer better iterations have already been developed. The average UK skier will have to use their skis on at least 1 trip per year for 6 – 8 years to get back the cost that renting each time would equate to. If you were to spend a day on new skis compared to those 8 years ago, you would notice significant upgrades in weight and performance!
  4. Irregular use. As much as I would love to spend every day skiing in the mountains or surfing, the unfortunate reality of life is that this is rare. So much of the equipment bought and stored gets very little use meaning that we are needlessly manufacturing and transporting kit around the world resulting in increased pollution from manufacture and additional carbon emissions in the logistics of getting it to the shop and then into your home. The outdoor industry needs to start taking sustainability and climate change more seriously – the natural environment is what brings us so much pleasure yet little is being done to conserve it. Rental is a way that each of us can do our part.

Challenges For Kit Renters

With that being said, the current rental solutions are often far from the answer! I have been into so many ski, bike and surfboard rental companies (UK and abroad) where the available selection is awful. For many companies, courses are where they focus their time, hire is just a side hustle for kit that isn’t being used. This is by no-means brushing every company with this brush, but the great ones can be very hard to find. Here are the problems that we have found:

  1. Access to quality kit. I was recently in Brazil, one of the surf capitals of the world and was amazed at how difficult it was to find a decent board to surf at Copacabana and Ipanema beaches (the 2 main beaches in Rio). There was not a single place to rent along Copacabana despite the number of surfers in the water and the high quality waves. I was told to go to Ipanema to rent, but the boards available on the beach looked like they came out of the original ‘The Endless Summer’ – a wonderful film but not exactly what I was looking for…
  2. High rental prices. This really does speak for itself. On the same Brazil trip mentioned above, we wanted to hire bikes for the day to explore the beautiful forest surrounding a town we were visiting. There were tourist agencies offering guided cycle rides at the cost of nearly £100 each for 4 hours (Crazy!!) and we were told that if we wanted to go off and do our own thing we could, but the price would be the same! Just one story of mental rental prices…
  3. Inconvenient. For both instances mentioned above, they took a lot of time and effort for little gain. I spent about 3 hours looking for a surfboard and my wife and I then spent another morning trying to get out for a cycle. On a once in a lifetime trip, the feeling of time being wasted is horrible and its something we want to cut out as much as possible.

We Solved It!

So far this doesn’t paint the best picture, but wait…Its changing with KitUp!

For kit owners, KitUp allows you to rent out your kit when you aren’t using it. Simple. With the current economic climate every little helps and now you can make your kit work for you and earn some of that initial investment back over time. It also means that your overall carbon footprint and impact on the environment will decrease as you are allowing others to get into the outdoors without having to buy new kit. Your kit will get more use throughout its life, exactly as it was designed!

For those looking for kit, you can now see exactly what is available, where it is, how much it will cost and then can have a conversation with owner or rental business without wasting a minute, all within the app! We have seen great quality equipment being listed at amazing prices and we are so excited at the thought of this on a global scale. Imagine going anywhere in the world and logging into one app to find kit, instructors, the top locations and meet new people?!

Give it a try. You won’t regret it.

What Should I Wear When I Ski?

If you are lucky enough to be hitting the slopes this season, just remember that the mountains can be extremely fickle and that preparation is key to having fun. You might be thinking about what upgrades you want to make to your wardrobe, or whether you really need to take that extra jacket. Here is my take on what to wear when out in the mountains (I will also link in some of my favourite products).

Always Start With A Base Layer

Regardless of whether I am going out climbing, walking or skiing, I will always start with a solid base-layer. They keep you warm, give you some support and are incredibly versatile. Personally I always go for layers made from natural fibres (wool, bamboo etc) as they are more comfortable, better at wicking away sweat, regulating my temperature and can also be worn over multiple days without smelling!

Here are a few of my favourites to wear:

Stellar Base Layer £95 for top + bottoms (pictured left). This is a lighter weight set than the others and is great for days where it’s a bit warmer or when you are travelling light on a ski-tour. They are incredibly stretchy and because they are seamless, are wonderfully comfortable.

Icebreaker – many options available. Everything that Icebreaker produce is 100% sustainably sourced merino wool. I have this one and love the panel system. It has wicking areas underneath the arms, across the back and down the forearms that not only help with temperature but also add stretch.

Finisterre Bora Bamboo Hoody (£55). If being stylish is your thing, then the Bora is definitely one for you. It is not only really well-priced, warm and lightweight but can also be worn off the mountain. Everything that Finisterre produce is sustainably sourced.

The Mid Layer

Once you have your base-layer sorted, its time to think about the mid-layer. For this, you want to have something that is warm, but breathable as well as giving you freedom of movement. If you wear something that is too constrictive you will likely be uncomfortable and will overheat. When this happens you will sweat a lot more and when you stop, this will feel very chilly. There are so many options out there, but these are my picks:

Trusty Old Wool Jumper (pictured above). This might look like something that Sir Edmund Hilary took up Mt Everest in 1953 but it is my favourite layer to wear in the mountains, so long as it doesn’t get wet! It is a heavy wool knit that is incredibly warm yet highly breathable. You will most likely already have an old one somewhere at home, so give it a try before you go and buy some highly technical ski mid-layer. If you do want to splash out, here are a few to look at:

Patagonia – R1 hoody – Patagonia will always be a go-to for me when it comes to outdoor equipment. Partly because thei kit lasts a lifetime and comes with many repair guarantees, but also because the values of the company align with my own and those of KitUp.

Stellar – Guide Merino – This is so well designed. I realised when I first put it on that it stretched in the precise areas that I wanted it to, but was generally athletically fitting. The hood size is perfect and can fit over a helmet when needed. The pockets are big and easily accessible without having to remove gloves. Like with everything else from Stellar, their kit is designed to work together seamlessly and it does.

Montane – Protium Montane is a wonderful British mountaineering company that have really developed over the last 10 years or so. The Protium is a really versatile jacket that can take a lot of abuse. After all, it was developed for winter climbing in the UK, a very cold, wet and windy business.

The Down Jacket

For many, skiing is not just about cramming as many runs into the day as possible. It is about spending time with loved ones, taking in the views, the mountain air and of course, cheesy mountain food! When you stop, you cool down incredibly quickly, so grabbing your down jacket from your bag keeps you nice and cosy. On days where the weather does not look like this, you might even find yourself skiing with it on for much of the day. Lastly, the bit that we don’t lie to think about, injury. If you or someone else is unfortunate enough to fall and seriously injure themselves, it can take time for mountain rescue to get to the scene. It is imperative to stay as warm as possible so having a good down jacket close to hand can be very helpful indeed. Again, there are so many options but these are my favourites and have worn them for years:

Stellar – Stretch Down Jacket (photographed above). I probably wear this jacket more than any other I own. Just this morning I wore it while walking through London in -3 degrees to get to the gym and next month I will be wearing it skiing in Meribel. It comes with me on every adventure and when dirty, it can be machine washed/dried – just throw in some tennis balls to fluff it up. It is incredibly warm and very stretchy, making it great for activities like climbing and skiing.

Dynafit Radical 3 – An incredibly lightweight primaloft jacket, this is designed for getting around quickly. I bought this whilst preparing for the Patrouille des Glaciers ski-mountaineering race last year for which, weight is the number one concern. I was amazed by how good it was and how warm it was! If you are looking for something light, then this is definitely worth considering.

The Waterproof Outer

Until now it probably looks like I only venture out on blue, sunny days…If only that was the case! The reality is that, often as not, the clouds are in and snow is falling. Funnily enough, snow is precipitation, therefore without a good waterproof outer layer, we would get cold and wet very quickly! 10 years ago, everyone was obsessed (and many still are) with the trade mark of ‘Gore-Tex’ as the only product. Now, lots of outdoor companies have developed their own equivalent technology for waterproofing their clothing. The important number is the ‘hydrostatic head’ number (usually in thousands of milimetres). A good number is anything above 10,000 mm.

Another thing to think about is how robust the clothing is. Outdoor sports like skiing can now be very technical (like ski-mountaineering) so can be incredibly light weight. Generally speaking the lighter something is, the more expensive it will be and/or the less robust it will be. Here are my go to winter options:

Stellar Guide Shell Jacket – I have had this jacket (pictured above) for 6 years and have used it for a minimum of 2 months each season. The only upkeep required has been to add some glue into a seam on the hood and then to treat it with waterproofing to make sure it stays mountain ready. There are lighter jackets but I have not found a better all-rounder yet.

Patagonia Storm – Another solid jacket choice that will work as well for walking down to the supermarket in the rain as it will serve you on the mountain slopes. Great flexibility as well as a low carbon footprint. This is always something to think about when buying new gear. Could you fix your old stuff instead?

Its All About The System

Whatever you choose to wear, it is all about the system so make sure you understand how your clothing works before getting on the lift. The main questions to answer are: am I warm and comfortable? Do I have additional layers to put on? Am I prepared for a colder and wetter day than forecasted? If this is a ‘yes, yes, yes’ then you are ready to pick up your skis, sling them over your shoulder and have a great day. See you out there.

Bruce Leishman
Founder & CEO of KitUp Adventures

The KitUp Summer Guide

 KitUp App   FAQ’s   Instagram   Facebook 

The KitUp Summer Guide

What you will read in the next 5 minutes: Our 5 favourite places to surf, paddle, cycle and walk in the UK this summer.  Start your next #KitUpAdventure 

Surf – remember the suncream!

Summer surfing might not offer so many of the thrills of winter but that does not mean you can’t enjoy it. The water is finally warm(er), the sun is out and there is plenty of fun to be had on higher volume boards. It is also the perfect time to learn. If you want some bigger waves head straight to number 5.

1. Woolacombe, North Devon. Suitable for all experience levels and lovely town to explore after your surf. Woolacombe has been voted one of the best surfing beaches in the UK many times!

2. Newgale, Pembrokeshire. Suitable for all experience levels but can form a fast hollow wave at times – experienced surfers only. Great cafe/surf shop on the beach too.

3. Saltburn, Yorkshire. Picturesque seaside town. Beach is suitable for all with a point break at the south end. This gets very shallow at low tide so be careful of the rocks.

4. Pease Bay, Berwickshire. Being close to Edinburgh, this little beach-break can get busy when the conditions are good. Stunning beach that is suitable for all levels.

5. The Wave, Bristol (this might be cheating, but its so much fun). Without a doubt the best and most consistent surf in the UK this summer…It is not the same as being out in the ocean but if you crave a goos surf, this is the place for you. Pick your style, no battling for waves and suitable for all levels.

Paddle – Best spots for a summer adventure.

The summer is a great time to explore the British waterways by paddle. Whether you want to SUP across beautiful lakes or sheltered ocean bays or want day-long sea kayaking trips there is something here for all.

1. Ullswater, Lake District (SUP & kayak). One of the most famous spots in the Lake district and for good reason; it is often calm and beautiful. It’s an easy place for most people to paddle out from by either SUP or kayak.

2. Durdle Door, Dorset (SUP & kayak). Quite possibly the most iconic beach on the south coast with the enormous archway just meters from the beach. If you like Insta shots then this is the place to be! Top tip, get there early or parking will be very hard to come by.

3. Stackpole Quay, Pembrokeshire (SUP & kayak). Pembrokeshire is one of our favourite adventure spots across the UK for everything. This route from Stackpole to Barafundle Bay is a great spot to try and see the dolphins, porpoises and basking sharks that often play in the Bay.

4. River Cam, Cambridge (best for SUP). Most explore the architectural tour by punt, but we can do better! Take your SUP and explore at your own pace, stopping off for lunch at one of the many river-side restaurants along the way. Great for a day out with friends.

5. Oban, Argyll & Bute (sea kayak route). If you are looking for a real paddle adventure this summer then look no further. It feels remote, the weather is unpredictable and the landscapes are breathtaking. You will find no fresher fish and get to beaches that nobody else can. What more do yo need?!

Bike – Do you road, gravel or mountain?

In the UK we are spoilt for choice when it comes to cycling. From quiet roads through the Cotswolds to the downhill mountain-biking centres of the Black Mountains and Cairngorms there is something for all and never too far away. It is also much easier to find the motivation to get out in the summer, so let’s celebrate that!

1. Ballater. The heart of the Scottish Highlands, Ballater holds some of the finest MTB routes in the country like Heartbreak Ridge as well as great access to the winding roads within the Cairngorms National Park. Whatever your style, it won’t disappoint.

2. Cotswolds. Villages like Castle Combe that are nestled away in steep valleys give some amazing hill climbs and beautiful views. It is always easy to finish rides at traditional pubs, or in the centre of Bath if you want to explore the city at the heart of many period dramas!

3. Brecon Beacons & the Black Mountains. If you like the idea of epic scenery, buses taking you to the top of the mountains for you to then fly down them like a dog going after a stick then you need to get to the Black Mountains Cycling Centre ASAP. If that isn’t quite for you, there are also amazing gravel routes to explore and quiet country roads that will give you some serious elevation data for STAVA.

4. Isle of Wight. One of the best day-long cycling adventures in the UK. It all starts with a ferry ride from Portsmouth to Cowes (Red Funnel Ferries) which takes about 45 minutes. If you get this nice and early you will have time for a quick breakfast in Cowes before starting your 106 km circumnavigation of the wonderful island. Top-Tip: check the wind forecasts before deciding which way to go (clockwise or anti-clockwise).

5. Cheddar Gorge. There are some charming road cycling routes that all take you through the Gorge. If you have not been, we cannot recommend it enough, it feels like something from a film, especially in late spring when everything is flowering. Other than road cycling there are some great trails that give equally good views across Somerset.

Trail – make the most of the long days with a few long hikes.

We are all part of this KitUp Community because we love to explore and there is no better way of doing that, than on our own two feet. Walking through wild places connects us back with nature and there is now such a plethora of science telling us how essential this is for our own mental fitness. So far, picking 5 adventures for each activity has been tough, but this is on a whole new level. We could write books on the hikes that we recommend but will keep it short here! 

1. The Quiraing. The Isle of Skye is filled with beautiful hiking route but the needles of Quiraing are a spectacular sight (photo above). Other famous walks on Skye take you to the Fairy Pools and to the Old Man of Storr.

2. The West Highland Way. This 150 Km hike takes you from Milngavie in Glasgow to Fort William. It takes you from countryside parks to loch-shores and open moorlands to jutting mountains. It usually takes 3-5 days to complete but there are plenty of places to stop along the way. A great challenge to set yourself.

3. Kinder Scout. This full-day circular hike winds its way around a vast upland plateau. En route, walkers will pass the dramatic waterfall of Kinder Downfall, and can complete the hike with an optional but entertaining scramble across Grindsbrook Clough. This is just one of the many great days to be had in the Peak District.

4. Yorkshire 3 peaks. If you want a BIG day then look no further! This route cover 24 miles and has more than 1500m of elevation. It covers the peaks of Pen-y-ghent, Whernside and Ingleborough and if you are attempting ‘The Challenge‘ then you will be aiming for less than 12 hours. Best of luck, better get going!

5. Snowdon summit. You may not know this but there are 6 separate routes for getting to the summit of Snowdon. They vary in difficulty but all tend to be between 7 – 9 miles (and take about 6hrs there and back). This is just one of the many walks in the area and if you really want to get a multi-activity trip in, why not pair it with a surf at Surf Snowdonia or a cycle across the hills?!

Stay Safe This Summer

2021 was a record year for many things, including the number of rescues by the Royal National Lifeboat Association – more than 40,000! At KitUp we want everyone to make the most of the summer but we also want to reduce risks. When you decide to go to the breach, make sure you have thought about some of these questions:

1. Does the beach have lifeguards? This is a great resource for understanding what rescue facilities are where as well as having access to the top tips around water safety.

2. What is the weather going to do? This is particularly important for planning paddles on rivers, especially in areas prone to flash floods. In 2021 we saw some awful accidents with stand up paddlers that had not realised there was going to be intense rainfall and it resulted in tragic loss of life. Plan ahead + know the risks = far safer fun.

3. Do you know about rip tides? The number one cause of RNLI call out at beaches is people being pulled out to sea in rip tides. Rip’s are areas where the water is trying to get back out to sea far faster than at other points. You will see surfers use them as they are so much faster to get out behind the breaking zone. For swimmers, if you get caught, remember: stay calm and DO NOT fight against the current. Swim out to the side, parallel with the beach until you are free of the current and then come back in.

If you are enjoying the content in our news letters, please share it with your friends and encourage them to join the community by signing up HERE. You can also follow us on Instagram, Facebook & Twitter. If you would like us to answer your questions in the next newsletter, drop us an email and we will be sure to give you a shoutout!